Sunday, December 11, 2016

"Easy Chocolate Ganache” (with All possible tips, do’s & don’ts) Recipe

“Easy Chocolate Ganache” (with All possible tips, do’s & don’ts) Recipe 


Recipe Cuisine:Continental  | Recipe Category: chocolate,dessert
Prep Time: 2 mins    | Cook time: 60 secs     | Serves: 2-3


Ganache is like liquid gold with its ultra chocolaty flavor and rich, creamy, and luscious texture.
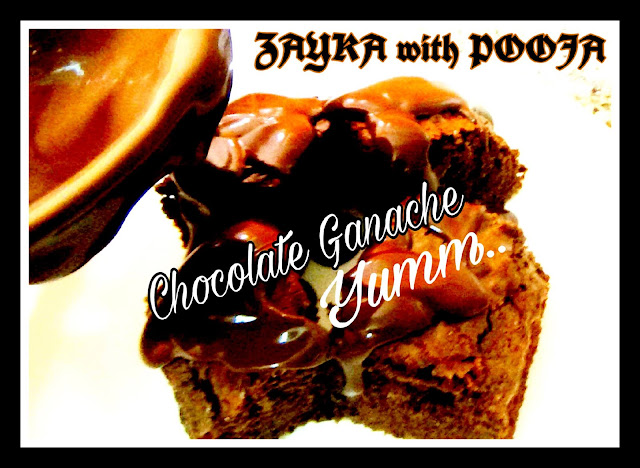
CHOCOLATE GANACHE is a glaze, icing, sauce, or filling for Cake, Brownie & pastries made from chocolate and cream.(Let's prepare this 
in very easy way & in less time)


Ingredients:
4 ounces Baking chocolate (semi sweet, cocoa 70-90%) , coarsely chopped
·         4 ounces or 1/2 cup heavy cream
·         1 tablespoon unsalted butter, at room temperature(optional)
                                    Step by step procedure:


Step-1 In a glass bowl,add coarsely chopped semi sweet Baking chocolate.

Step-2 Now add Heavy cream.

Step-3 Now mix both very gently. You can add butter(optional).Microwave this bowl for only 20 secs. 
Then take it out & whisk it well.

Step-4 Again microwave this for 20 sec, repeat once 
more this process till all the chocolate and 
cream mix completely

Step-5 Whisk it well.

Step-6 Rich creamy shiny chocolate Ganache is ready 
to use.


Enjoy it as it is or pour rich creamy chocolate ganache on CAKE or 
on Brownie..YUMMYYY


                                             Easy chocolate ganache cake Recipe...
                                                 COMING SOON :-)


TIPS:

1-If the chocolate gets too hot it may burn and cause the chocolate to seize, turning grainy and thick.
2- Before using chocolate for baking, for easy melt,finely chop or grate the chocolate.
3-Weight out the amount of chocolate called for in your recipe. If you aren't following a recipe, start with a small amount and make more as needed.
4-weigh the amount of cream needed for the ganache in a separate bowl.
5-If you plan on pouring the ganache over a cake, pie, or pastry, it will need to be loose enough to flow but thickened enough to stay on the pastry.
6-To whip the ganache for frosting or for layer cake filling, cool the ganache until it is thick, but still soft, and then beat in a stand mixer or with a hand held mixer, until the ganache is fluffy and has lightened in color, about 1 or 2 minutes.
7-To use the ganache make truffles, you may need to set the pan in the refrigerator so the ganache cools. Remove the pan every 5 minutes or so and stir so that the ganache cools evenly. As the chocolate begins to stiffen, stir it more frequently — it will go from soft to very hard quite suddenly. (If this happens, soften the ganache over gently simmering water, stirring until you've reached the right consistency again.)
8-The easiest way to work with ratios is to measure both the cream and the chocolate by weight. If you don't want to weigh your cream, remember that 1 cup of liquid is 8 ounces (1/2 cup=4 ounces).

Alternate method to prepare chocolate ganache(without using microwave):
1-Pour the cream into a small saucepan and place it over medium-low heat for a few minutes. Keep an eye on the cream — it's not necessary to boil or simmer it. It just needs to get hot. The cream is ready when you can place a finger in the cream and keep it there for 3 to 4 seconds. Turn off the flame and remove the cream from the stove.
2-Chop the chocolate: While the cream is heating, chop the chocolate into fine pieces.
3-Add the chocolate: Scoop the chocolate into the cream. Stir gently to distribute the chocolate through the cream and then let it sit for a few minutes to give the chocolate time to soften and melt.
4-Stir the mixture: With a spatula or wooden spoon, stir the ganache. At first it might look spotty and broken but keep stirring until it comes together in a creamy mass.

  "Do you have any questions?"
    Please leave a comment below with any questions. Thank you! 


Monday, December 5, 2016

“Amazing Chocolate Brownie-One Bowl Baking” (with All possible tips, do’s & don’ts) Recipe


“Amazing Chocolate Brownie-One Bowl Baking” (with All possible tips, do’s & don’ts) Recipe


Recipe Cuisine:Continental  | Recipe Category: Dessert
Prep Time: 5-6 mins    | Cook time: 30-40 mins     | Serves: 3-4


Ingredients:

1 1/2 cup all-purpose flour
1 ½ cup powder sugar
60 gms (½ stick) Unsalted Butter (fresh & at room tem)
3 eggs (fresh & at room temp)
4 ounces (125gms) semi sweeten Baking Chocolate
1/4 cup cocoa powder
¼ teaspoon salt(skip it, if using salted butter)

½ teaspoon Baking powder (add only If looking for Cakey brownie texture & skip adding baking powder if want to make chewy fudgy brownie)


Step by step procedure:


Step-1 In a big glass bowl, add soften Butter (at room tem, if not at room tem then microwave it for 30 sec) then add powdered sugar.

Step-2 Now Wisk both till light & fluffy.

Step-3 Add baking chocolate (semi sweet, cocoa 70-90%)

Step-4 Microwave bowl for 30 sec or more till it melt.

Step-5 Whisk it well.

Step-6 Now add eggs one by one.

Step-7 Now add cocoa powder (for extra rich color of brownie)

Step-8 Now whisk all very gently.

Step- 9 With all purpose flour add baking powder.

Step-10 Sift both(this helps to combine them evenly)

Step-11 Now add dry ings with wet ings & fold them very gently.

Step-12 Preheat microwave at 180C / 350F

Step-13 Pour the brownie batter into the baking tin(first, put the baking parchment  paper around the bottom & sides)

Step-14 Bake  it for 35-40 mins.

Step-15 Let it rest for 15 mins. Cut the brownie into desired
shape..

Enjoy it as it is or pour rich creamy chocolate ganache on each
brownie..YUMMYYY


                                             Easy chocolate ganache Recipe...
                                                 COMING SOON :-)


TIPS:


1-Before making  Browine, make sure that all ingredients (including egg, butter etc) are at room temperature.

2-Don’t use very very soft butter or liquidly butter.

3- Always add eggs one by one.

4- Use Fresh eggs, fresh butter(not too old), good quality of baking chocolate(semi sweeten), good quality of cocoa powder.

5- Role of eggs:
§  In cakes & brownie, eggs leavening and moisture.
§  In cookies egg plays binding

6-Use fresh eggs in your brownie recipe because fresh eggs are more acidic than old.

7-What type of butter is required in brownie recipe?: As unsalted butter has less water content than of salted butter so when unsalted butter will be creamed with beater then it will more form stable structure rather than salted butter, so prefer to  use unsalted butter to maintain airy pockets by creaming it.

8- Always mix the ingredients on low speed so that air pocket created will not destroy (by hand whisk or by beater)

9-How to soften the butter before its use in a cake or brownie recipe: Don’t soft butter in a microwave as it will destroy the emulsion, which will affect creaming of butter, hence always take out butter from the freeze and just cut into few pieces and put for some time at room temperature.

10-Be accurate with weight and ingredients used in brownie recipe
I)                  If you add more amount of baking powder then your brownie will not rise more.
II)               Yes, you can always sift all dry ingredients as many times (3 times is good) to create more and more air pockets.

11- Always while adding dry ingredients into wet ingredients, first add large amount of dry ingredients because once the liquid is added then avoid over mixing in order to limit gluten formation.


ü BAKING OF CAKE & BROWNIE

12-Once the brownie batter is prepared in a baking tin, put it immediately in a microwave because the rising agents will start working when added with wet ingredients (while folding they start their work so put it immediately).

13- Put the brownie batter tin always on the correct self in a convection mode. Always go to middle rack (for equal baking).

14-Make sure not to over bake the brownie in microwave it is one of the reason of getting dry brownie.

15-Don’t over fill your baking tin with  batter otherwise while baking time brownie will rise and come out of the tin and fall all around in oven.

16-Always smooth the top of batter (using spatula) in a baking tin before baking it and make sure to tap the tin for at-least 3 to 4 times so that if any air left will be gone.

17- Best oven temperature to bake brownie is ‘350 degrees Fahrenheit (350°F = 180°C).

18-If using cooker to bake your cake & brownie then, before baking it make sure to preheat cooker and add salt in it(so that brownie  is evenly cooked and not burn from bottom heat of cooker).

19-Don’t open the door of microwave before 20 min of baking, otherwise due to temperature change (attack) brownie will shrink in middle.

20-Let the brownie bake at least upto 30 mins, then open the door and check it with toothpick and if needed then again bake it till golden & perfect brownie.

21-Always let the  brownie  rest in the tin for 10 mins and then cut the sides with knife and put the flat side down on wire rack until completely cooled down.

     
  "Do you have any questions?"
    Please leave a comment below with any questions. Thank you!


Wednesday, October 26, 2016

How to make PERFECT PURI (With all possible Tips, Do’s & Don’ts)” Recipe


How to make PERFECT PURI (With all possible Tips, Do’s & Don’ts)” Recipe

Recipe Cuisine: Indian | Recipe Category: Bread
Prep Time:  10 mins   | Cook time: 10 mins     | Serves: 3-4


Make sure to look all the related tips, do's & don't of the recipe.


                       HOW TO MAKE PERFECT PURI :-)


Step-1 In a bowl, add the wheat flour, melted ghee, semolina (FOR
CRISPY PURI), salt (IF LIKE SALTY TASTE). Mix them well. 

Step-2 Now slowly add Water.

 Step-3 Most important step for Perfect puri is to knead well.
 The dough should be a little hard (Hard Than chapati dough ).
Don't add too much water to make it too soft. 

Step-4 Cover & Keep the kneaded dough at rest for 10 Minutes (TO SET). 

Step-5 Make small balls out of the dough. 

Step-6 Before starting to roll the dough,  heat enough oil in a kadhai for deep frying.

 Step-7 Carefully, drop the rolled dough submerged into the oil.

Step-8  Using a slotted spoon, gently push and slide the spoon all over the
dough. This will encourage the dough to puff up.

 Step-9 After it's completely puffed up, flip it over and fry it for a few
seconds.

Step-10  After the puri has turned golden in color, remove from the oil and
transfer to a plate lined with paper towel.


TIPS:
                                                  PERFECT PURIES


1-    Add water little by little so that flour and water incorporate slowly.

2-    For making lil more crispy puris: Add Tablespoons of Semolina or rava to the dough.

3-    Adding a pinch of sugar gives a nice golden color to the puri. But it is optional to use.

4- Addition of ghee keeps the puri soft and gives a nice flavour. But do not add more than the mentioned quantity.

5-You can also add a teaspoon of hot oil while kneading the dough. Oil will help the dough not to dry out and forming a crust.

6- You can also use a food-processor to make the dough.

7- Dough consistency is more important. If u make it too hard or sticky, puri will be too  hard. If the dough is too soft , puri will become very soft. If u feel , u have added very less water and the dough is too tight, beat the dough well for few minutes. It  will become soft. Then make puris. It will come out well.

8-If you use too much of wheat flour for dusting then while deep frying the wheat flour particles get fried and burnt in the oil. These burnt particles then settle down at the bottom and stick to the later batches of puris.

9-The dough should be slightly stiff so that less amount of wheat flour can be dusted on the puris while rolling.

10- Divide the dough into equal small balls.

11-Try to use minimum amount of dry flour for dusting, if using more dry flour, puri will become lil hard.

12-Roll it out with a rolling pin to form even round discs.

13- Roll the dough to small slightly thick round shape. The thickness should be medium, not too thin like chapati. If u make it thin, puris won’t puff up.

14-Make sure there are no holes while u roll. Puris won’t puff up if there is a hole.

15-Do not rest the dough. Make puris immediately else it will drink more oil.

16- Arrange the puris in a paper or a greased plate without overlapping each other.

17- Test the oil by putting in a small ball of dough to see if the oil is ready. The little ball of dough should go to the bottom and then after a few seconds float to the top of the oil. The oil is then ready.

18- If the puris do not puff up, then either the dough has not been kneaded well or the puris have not been rolled out evenly or the oil is not hot enough.

19-Ensure that the oil is neither too hot nor cold. if hot, the puris get browned quickly. If it is not enough hot, then the puris absorb more oil.

20- Puri absorbs more oil if the dough is very soft.

21- After u make 2 –3 puris, adjust the flame, check the oil temperature again & fry the puris. If the oil is too hot, switch off the flame for few minutes to reduce the heat. Else add some more fresh oil to reduce the heat. By doing this way,u can make puris of even color till the end.

22- The Puri will settle at the bottom for a few seconds before it comes up to float. Once it starts floating, gently press on one side with a frying ladle. This will help the Puri to puff up.Flip the Puri and cook on the other side till golden brown.

23- Always fry puri in batches. Puris rolled initially won't puff . It would have dried a bit .

24- Puris should be served hot to retain the puffiness; it will loose its puffiness when it turns cold.


  "Do you have any questions?"
Please leave a comment below with any questions. Thank you!